

0 Spicy Yoghurt | Last updated: 15 November 2026 | Algorithm tutorial
Create Conway's Game of Life in JavaScript
Create Conway's Game of Life in JavaScript on the HTML5 canvas. Learn the rules, calculate which cells live or die each generation and draw your own cells with the mouse. Load famous patterns like the glider gun, and download the free example code as a single HTML file.
Conway's Game of Life
In 1970, the mathematician John Conway invented the Game of Life. It's not a game in the usual sense, but more of a simulation. The technical term for it is a cellular automaton. The game is played on a grid of cells, and each cell is either dead or alive. With every step of the game, the grid evolves, and the rules decide which cells live on and which don't.

The canvas above runs the Game of Life. The game needs no input, except for the starting state of the cells. After that, every cell follows the same rules at each step to decide its fate. You can set up that starting state yourself: click Random to start over with a new random grid, or click and drag on the canvas to draw your own cells. Drawing pauses the game. Click Play to let it run again, or click Step to move forward one generation at a time.
The rules of Conway's Game of Life
The rules are pretty simple. Every cell looks at its neighbors to check whether its surroundings are underpopulated, overpopulated or suitable to live in. Each cell has 8 neighbors, except for the ones at the edge of the grid. The number of living neighbors determines what happens to a cell:
- Birth - A dead cell comes alive if exactly 3 of its neighbors are alive.
- Survival - A living cell stays alive if 2 or 3 of its neighbors are alive.
- Death - A living cell with fewer than 2 living neighbors dies of underpopulation, and one with 4 or more dies of overpopulation.
All cells apply these rules at the same time, so the whole grid turns into the next generation in one step. You'll often see the rules written as B3/S23: a cell is born with 3 neighbors and survives with 2 or 3.
You can play this game on paper and look for starting states that turn into interesting shapes or even moving objects. Die-hard fans hunt for guns and spaceships. A spaceship is a pattern that moves across the grid, and a gun is a pattern that keeps shooting them out. The smallest spaceship is the glider. Here's the Gosper glider gun in action, shooting one glider after another:
In this tutorial, you won't use paper. You'll create the Game of Life with JavaScript on the HTML5 canvas, and generate the starting state and every new generation in code. Later on, you'll even load this glider gun into your own grid.
Define the appearance and behavior of a single cell
Let's start by creating a single cell. It doesn't have to be smart. It's just a square on a grid that can be either alive or dead. Each state is drawn in a different color.
When you create a new cell, Math.random() decides its state. It gives you a number between 0 and 1, and the cell starts alive if that number is above 0.5. That's a 50% chance of starting alive. You can easily change the 0.5 to create different starting states: the higher it is, the fewer cells start alive. We have a tutorial on random numbers in JavaScript if you want to know more.
Create a new Cell class and give it a draw() method. You can choose to draw a square or go for another shape, like the circles in the demos on this page.
class Cell {
    // Set the default size and color for each cell
    static width = 10;
    static height = 10;
    static colorAlive = '#0099b0';
    static colorDead = '#303030';

    constructor(context, gridX, gridY) {
        this.context = context;

        // Store the position of this cell in the grid
        this.gridX = gridX;
        this.gridY = gridY;

        // Randomly decide if this cell starts alive
        this.isAlive = Math.random() > 0.5;
    }

    draw() {
        // Draw a square, let the state determine the color
        this.context.fillStyle = this.isAlive
            ? Cell.colorAlive
            : Cell.colorDead;
        this.context.fillRect(
            this.gridX * Cell.width, this.gridY * Cell.height,
            Cell.width, Cell.height
        );
    }
}
Each cell gets its column and row in the grid, and the canvas context, which it uses to draw itself. The static properties belong to the class itself, so all cells share the same size and colors. That's why you write Cell.width instead of this.width.
Build a grid with a lot of cells
Once your cell is ready, you can start creating a lot of cells. You're going to build a grid of 75x40 cells. That's 3,000 cells in total! The grid fills the canvas element exactly, since each cell is 10x10 pixels and the canvas is 750x400.
Put the grid in a new GameWorld class. It holds the canvas and its context, and keeps all cells in an array called gameObjects. You can fill that list with two nested for loops:
class GameWorld {
    static numColumns = 75;
    static numRows = 40;

    constructor(canvasId) {
        this.canvas = document.getElementById(canvasId);
        this.context = this.canvas.getContext('2d');
        this.gameObjects = [];

        this.createGrid();
    }

    createGrid() {
        for (let y = 0; y < GameWorld.numRows; y++) {
            for (let x = 0; x < GameWorld.numColumns; x++) {
                const cell = new Cell(this.context, x, y);
                this.gameObjects.push(cell);
            }
        }
    }
}
The cells are stored row by row: first the 75 cells of the top row, then the 75 cells of the next row, and so on.
The constructor takes the id of a canvas in your HTML page, like <canvas id="canvas" width="750" height="400">. Create the game world when the page has loaded, with let gameWorld = new GameWorld('canvas'); in window.onload. The example code at the end of this tutorial shows how it all fits together.
Add a game loop to repeat all operations
You don't create a new generation of cells just once. You do it hundreds of times, so you need a way to keep calculating the next one. A loop would be perfect for this. In games, a core loop like this is called a game loop.
There are a lot of ways to create a game loop, but a reliable one is to use requestAnimationFrame(). We have a tutorial on the JavaScript game loop if you're looking for a more in-depth explanation. Here's an example:
// Start your loop for the first time
window.requestAnimationFrame(() => this.gameLoop());

gameLoop() {
    // Check the neighbors of each cell and update the state
    this.updateCells();

    // Clear the screen
    this.context.clearRect(
        0, 0, this.canvas.width, this.canvas.height
    );

    // Draw all the game objects
    this.gameObjects.forEach((gameObject) => {
        gameObject.draw();
    });

    // The loop function has reached its end,
    // keep requesting new frames
    setTimeout(() => {
        window.requestAnimationFrame(() => this.gameLoop());
    }, 100); // The delay will make the game easier to follow
}
In this example, the loop starts by checking the surroundings of each cell, and then draws all cells to the canvas. Each frame of the loop is one new generation. Before it requests the next frame, it waits 100 milliseconds, so you can watch the game evolve. Add gameLoop() to the GameWorld class, and put the first line of the example at the end of its constructor to start the loop.
If you want to learn more about drawing graphics on the HTML5 canvas, check out the tutorials on drawing shapes and text, and on images and sprites.
Check the surrounding cells
For every step in the evolution of this Game of Life, all cells need to check their neighbors to see if their neighborhood is under- or overpopulated. You can do this by looping over all cells and counting the living neighbors of each one.
In the demo above, the red cell is the one currently checking its surroundings. It steps through every cell, row by row, just like the loop you're about to write. At each cell, it counts the blue cells around it as living and leaves itself out. Move your mouse over the canvas, or tap it, to pick a cell yourself.
You'll also need a safety check for the edges of the grid. Cells beyond the edges don't exist, so they count as dead. Add this code to the GameWorld class:
static neighborCellsMap = [
    [-1, -1], [0, -1], [1, -1],
    [-1, 0],           [1, 0],
    [-1, 1],  [0, 1],  [1, 1]
];

updateCells() {
    // Count the living neighbors of every cell
    for (let y = 0; y < GameWorld.numRows; y++) {
        for (let x = 0; x < GameWorld.numColumns; x++) {
            let numAlive = this.getNumAliveNeighbors(x, y);
        }
    }
}

getNumAliveNeighbors(x, y) {
    // Check every surrounding cell in the neighborCellsMap
    return GameWorld.neighborCellsMap.reduce(
        (numNeighbors, [dx, dy]) => {
            return (
                numNeighbors +
                (this.isCellAlive(x + dx, y + dy) ? 1 : 0)
            );
        },
        0
    );
}

isCellAlive(x, y) {
    // Everything beyond the edges counts as dead
    if (
        x < 0 || x >= GameWorld.numColumns ||
        y < 0 || y >= GameWorld.numRows
    ) {
        return false;
    }

    return this.getCell(x, y).isAlive;
}

getCell(x, y) {
    return this.gameObjects[this.gridToIndex(x, y)];
}

gridToIndex(x, y) {
    return x + (y * GameWorld.numColumns);
}
The neighborCellsMap lists the 8 directions around a cell. Each one is a step dx to the side and a step dy up or down. getNumAliveNeighbors() goes through them with reduce(): it starts at 0 and adds 1 for every direction where isCellAlive() finds a living cell.
Because the cells are stored row by row, each new row starts 75 positions further along in the array, one for each column. So gridToIndex() multiplies the row y by the number of columns and adds the column x.
Implement the game rules
Now that you know how many neighbors are alive, you can implement the game rules. Basically, they boil down to these three conditional statements:
- 2 living neighbors - The cell keeps its current state. A living cell survives, and a dead cell stays dead.
- 3 living neighbors - The cell always ends up alive. A living cell survives, and a dead cell comes alive.
- Any other number - The cell ends up dead. A living cell dies, and a dead cell stays dead.
When you translate this into code, you'll end up with something like this:
updateCells() {
    // Count the living neighbors of every cell
    for (let y = 0; y < GameWorld.numRows; y++) {
        for (let x = 0; x < GameWorld.numColumns; x++) {
            let numAlive = this.getNumAliveNeighbors(x, y);
            let cell = this.getCell(x, y);

            if (numAlive == 2) {
                // Do nothing, keep the current state
            } else if (numAlive == 3) {
                // Comes alive
                cell.isAlive = true;
            } else {
                // Dies
                cell.isAlive = false;
            }
        }
    }
}
What's going wrong here?
OK, that's it! You should have a running example now. Let's check it out on the canvas below.
That's odd. It doesn't look like the patterns you'd expect from the Game of Life. In the demo at the top of this page, most of the grid ends up empty, with small groups of cells that blink or move around. Here, the whole canvas stays full of long lines and tangles of cells, and everything seems to grow a bit too wildly.
So what's happening here? The loop changes every cell right away. When the next cell counts its neighbors, some of them already belong to the new generation, and others don't. The rules only work if every cell looks at the same generation.
Calculate each generation simultaneously
The solution is to not change the current state of any cell while you're still checking the neighbors. Only change the state when all cells have been checked, so the whole new generation is created simultaneously. To do this, first store the new state of each cell in a property called isAliveNextFrame, and then apply it to all cells at once. Add this property to the constructor of the Cell class, with a starting value of false. Here's an example:
updateCells() {
    // Count the living neighbors of every cell
    for (let y = 0; y < GameWorld.numRows; y++) {
        for (let x = 0; x < GameWorld.numColumns; x++) {
            let numAlive = this.getNumAliveNeighbors(x, y);
            let cell = this.getCell(x, y);

            if (numAlive == 2) {
                // Keep the current state
                cell.isAliveNextFrame = cell.isAlive;
            } else if (numAlive == 3) {
                // Comes alive
                cell.isAliveNextFrame = true;
            } else {
                // Dies
                cell.isAliveNextFrame = false;
            }
        }
    }

    // Apply the new state to all the cells at once
    this.gameObjects.forEach((gameObject) => {
        gameObject.isAlive = gameObject.isAliveNextFrame;
    });
}
When you run your game again, the simulation will look a lot different. It should now resemble the example at the top of this page. Well done, you have your own Game of Life running!
Draw your own cells with the mouse
A random start is fun to watch, but it gets more interesting when you can add cells yourself. That way, you can try out your own ideas, like a glider or a row of 10 cells. The demo at the top of this page works like this: click a cell to bring it to life or to kill it, and drag to draw more cells.
To find the cell under the mouse, convert the position of the mouse to a column and a row. On a phone, for example, the canvas can appear smaller than the size you set in your HTML, so use its size on the screen:
addMouseInput() {
    this.canvas.addEventListener('pointerdown', (event) => {
        const cell = this.getCellAt(event);

        // Flip the cell you click, and draw with that state
        this.drawAlive = !cell.isAlive;
        cell.isAlive = this.drawAlive;
    });

    this.canvas.addEventListener('pointermove', (event) => {
        // Only draw while the mouse button is down
        if (event.buttons == 1) {
            this.getCellAt(event).isAlive = this.drawAlive;
        }
    });
}

getCellAt(event) {
    // The mouse position on the canvas, in screen pixels
    const rect = this.canvas.getBoundingClientRect();
    const mouseX = event.clientX - rect.left;
    const mouseY = event.clientY - rect.top;

    // Divide by the size of a cell on the screen
    const cellWidth = rect.width / GameWorld.numColumns;
    const cellHeight = rect.height / GameWorld.numRows;
    const x = Math.floor(mouseX / cellWidth);
    const y = Math.floor(mouseY / cellHeight);

    return this.getCell(x, y);
}
Call addMouseInput() in the constructor of GameWorld, and give this.drawAlive, the state you draw with, a starting value of true. If you start on a living cell, you erase cells as you drag. Pointer events work with a mouse, a pen or a finger, so you can also tap a cell on a phone. Want to drag objects around or build a joystick for phones? The tutorial on keyboard, mouse and touch controls shows you how.
Wrap around the edges
Right now, everything beyond the edges of the grid counts as dead. A glider that reaches an edge crashes and turns into a block of 4 cells that never changes. The Game of Life was meant for an infinite grid, though.
You can't make an infinite grid, but you can fake one by letting the edges wrap around. A cell on the right edge gets neighbors on the left edge, and a cell in the top row gets neighbors in the bottom row. Your grid becomes a donut, or a torus, as mathematicians call it. Add a setting for it, and change isCellAlive(), the method that checks if a neighbor is alive:
static wrapEdges = false;

isCellAlive(x, y) {
    if (GameWorld.wrapEdges) {
        // Wrap around: -1 becomes the last column or row
        x = (x + GameWorld.numColumns) % GameWorld.numColumns;
        y = (y + GameWorld.numRows) % GameWorld.numRows;
    } else if (
        x < 0 || x >= GameWorld.numColumns ||
        y < 0 || y >= GameWorld.numRows
    ) {
        // Everything beyond the edges counts as dead
        return false;
    }

    return this.getCell(x, y).isAlive;
}
Set wrapEdges to true to turn it on. Why add numColumns before taking the remainder with %? In JavaScript, the remainder of a negative number is negative too: -1 % 75 is -1, not 74. Adding numColumns first keeps the result between 0 and 74.
Load famous Game of Life patterns
Drawing a glider gun cell by cell takes a while. Luckily, there's a faster way. Fans of the Game of Life share their patterns as plain text: a dot is a dead cell and an O is a living one. LifeWiki, an online encyclopedia about the Game of Life, has thousands of patterns in this format. Put each line in quotes, and you can use the pattern in your code as an array of strings.
Add this method to the GameWorld class. It loads a pattern like that into the middle of your grid:
loadPattern(pattern) {
    // Put the pattern in the middle of the grid
    const left = Math.floor(
        (GameWorld.numColumns - pattern[0].length) / 2
    );
    const top = Math.floor(
        (GameWorld.numRows - pattern.length) / 2
    );

    this.gameObjects.forEach((cell) => {
        // An O is a living cell, anything else is dead
        const row = pattern[cell.gridY - top] || '';
        cell.isAlive = row[cell.gridX - left] == 'O';
    });
}
Every cell looks up its own spot in the pattern. A cell outside the pattern gets undefined instead of an O, so it ends up dead. Above and below the pattern, there's no row at all, so || '' uses an empty string instead of undefined. Without it, looking up a spot in a row that doesn't exist would throw an error. Try a few patterns in the demo below, and watch the code change along with them:
GameWorld.wrapEdges = false;

gameWorld.loadPattern([
    '........................O...........',
    '......................O.O...........',
    '............OO......OO............OO',
    '...........O...O....OO............OO',
    'OO........O.....O...OO..............',
    'OO........O...O.OO....O.O...........',
    '..........O.....O.......O...........',
    '...........O...O....................',
    '............OO......................'
]);
Here's what each pattern in the demo does:
- Glider - The smallest spaceship. It moves one cell diagonally every 4 generations.
- Spaceship - This one is called the lightweight spaceship. It moves in a straight line, 2 cells every 4 generations.
- Pulsar - An oscillator. It changes shape and returns to its original form every 3 generations.
- Glider gun - The Gosper glider gun from the animation above, the first gun ever discovered. Bill Gosper found it in 1970. It shoots a new glider every 30 generations.
- 5x5 square - A solid square of 25 cells. After 11 generations, it turns into 4 beehives. A beehive is a ring of 6 cells, and together the 4 beehives form a still life that never changes again.
With wrapEdges set to false, the gliders from the gun crash into the bottom edge. Set it to true, and they come back in at the top.
Experiment with different variations
You can experiment a bit further and try different colors, shapes or even game rules. A fun idea is to keep track of how long a cell has been dead and assign a color to each level of decay, so you get a nice fade-out effect. Here's a quick example:
To get this effect, give the Cell class an array of colors, from alive to long dead, and change its draw() method:
static fadeColors = ['#05ceec', '#0099b0', '#007a8c', '#404040'];

draw() {
    // Count the frames since this cell died
    if (this.isAlive) {
        this.deadCount = 0;
    } else {
        this.deadCount++;
    }

    // Every frame after its death, the cell gets a darker color
    const colorIndex = Math.min(this.deadCount, 3);
    this.context.fillStyle = Cell.fadeColors[colorIndex];
    this.context.fillRect(
        this.gridX * Cell.width, this.gridY * Cell.height,
        Cell.width, Cell.height
    );
}
Math.min() caps the index at 3, which points to the last color in fadeColors, so a cell that has been dead for a while stays dark. Give this.deadCount a starting value of 3 in the Cell constructor too, so dead cells start out with that dark color.
You can also give every new cell a color of its own, or change the rules themselves. Try a few variations in the demo below:
// In gameLoop(), count the generations
this.generation++;

// In updateCells(), when a dead cell comes alive,
// give it the color of the current generation
cell.hue = (this.generation * 4) % 360;

// In draw(), use this color instead of Cell.colorAlive
const colorAlive = 'hsl(' + this.hue + ', 85%, 60%)';
Here's what changes in each variation:
- Rainbow - Every new cell gets a color based on the generation it was born in, so you can see how life spreads from the 5 cells in the middle, a pattern called the R-pentomino. In hsl(), the first number is the hue, an angle on the color wheel from 0 to 360. Every generation moves the hue 4 degrees further around the wheel. Give this.generation a starting value of 0 in the GameWorld constructor. You can read more about hsl() in the tutorial on drawing shapes and text.
- Red vs. blue - There are two kinds of living cells, and at the start, every living cell is red or blue at random. When a dead cell comes alive, it takes on the majority color of its 3 living neighbors. The two colors fight over the grid. getNumRedNeighbors() works like getNumAliveNeighbors(), but only counts the red cells. On LifeWiki, this variant is called Immigration.
- HighLife (B36/S23) - A dead cell also comes alive with 6 living neighbors. That one small change makes room for a pattern that copies itself: the replicator.
- Seeds (B2/S) - A dead cell comes alive with exactly 2 living neighbors, and no cell ever survives. The pattern explodes.
- Day & Night (B3678/S34678) - A living cell stays alive with 3, 4, 6, 7 or 8 living neighbors, and a dead cell stays dead with 3, 4, 6, 7 or 8 dead neighbors. So if you swap living and dead cells, everything still behaves the same way.
- Maze (B3/S12345) - Cells survive with 1 to 5 living neighbors, so the pattern grows into a maze.
The numbers after the B and the S are the rule: how many living neighbors a cell needs to be born or to survive. In the code for HighLife, Seeds, Day & Night and Maze, those numbers go into two arrays, born and survive, and includes() checks if numAlive is one of them. Try your own numbers and see what kind of world you get.
Take the Red vs. blue variation a step further, with four colors instead of two, and you get a variant known as QuadLife. We used it to build Yoghurt Culture, a colorful petri dish where four colonies grow and fight for space. You can get its complete code as a premium download. It's a way to support Spicy Yoghurt, and you get something fun in return.
Common questions about the Game of Life
What happens to a solid square in the Game of Life?
It depends on the size of the square. A 2x2 square is a block, a still life that never changes. A 3x3 square turns into 4 blinkers after 5 generations. A blinker is a row of 3 cells that keeps flipping between horizontal and vertical. A 4x4 square dies out completely in 4 generations, and a 5x5 square becomes 4 beehives after 11 generations. To watch the 5x5 square turn into beehives, choose 5x5 square in the demo with the pattern buttons, further up the page.
Why is the Game of Life called a zero-player game?
Because nobody plays it once it has started. You only choose the starting state, and from then on, the rules decide everything. That's why it's more of a simulation than a game.
Is the Game of Life Turing complete?
Yes. With gliders as signals and guns to create them, you can build logic gates, memory and even a working computer inside the Game of Life. In theory, it can compute anything a regular computer can, with nothing but the three rules from this tutorial.
How do you make the Game of Life faster?
For a grid of 3,000 cells like the one in this tutorial, the code is more than fast enough. For bigger grids, store the cells in two typed arrays instead of one object per cell: one for the current generation and one for the next, just like the isAlive and isAliveNextFrame properties of a cell. In a Uint8Array, for example, each cell is a single number. Calculate the next generation in the second array, swap the two arrays and only draw the living cells. Most of the demos on this page work that way.
Example code: Conway's Game of Life
Here's an example page that puts the basics from this tutorial together in a single HTML file: the cells, the game loop, the rules, drawing with the mouse, wrapping the edges and loading patterns. Save the code as an .html file and open it in your browser:
<!DOCTYPE html>
<html lang="en">

<head>
    <meta charset="UTF-8">

    <title>Game of Life Tutorial | Spicy Yoghurt</title>
</head>

<body>
    <h1>Game of Life tutorial by Spicy Yoghurt</h1>
    <canvas
        id="canvas"
        width="750"
        height="400"
        style="border:1px solid lightgray;"
    >
        Your browser does not support the HTML5 canvas tag.
    </canvas>
    <script>
        'use strict';

        class Cell {
            // Set the default size and color for each cell
            static width = 10;
            static height = 10;
            static colorAlive = '#0099b0';
            static colorDead = '#303030';

            constructor(context, gridX, gridY) {
                this.context = context;

                // Store the position of this cell in the grid
                this.gridX = gridX;
                this.gridY = gridY;

                // Randomly decide if this cell starts alive
                this.isAlive = Math.random() > 0.5;

                // Store the state for the next generation here
                this.isAliveNextFrame = false;
            }

            draw() {
                // Draw a square, let the state determine the color
                this.context.fillStyle = this.isAlive
                    ? Cell.colorAlive
                    : Cell.colorDead;
                this.context.fillRect(
                    this.gridX * Cell.width, this.gridY * Cell.height,
                    Cell.width, Cell.height
                );
            }
        }

        class GameWorld {
            static numColumns = 75;
            static numRows = 40;
            static wrapEdges = false;
            static neighborCellsMap = [
                [-1, -1], [0, -1], [1, -1],
                [-1, 0],           [1, 0],
                [-1, 1],  [0, 1],  [1, 1]
            ];

            constructor(canvasId) {
                this.canvas = document.getElementById(canvasId);
                this.context = this.canvas.getContext('2d');
                this.gameObjects = [];

                // The state you draw with while you drag the mouse
                this.drawAlive = true;

                this.createGrid();
                this.addMouseInput();

                // Start your loop for the first time
                window.requestAnimationFrame(() => this.gameLoop());
            }

            createGrid() {
                for (let y = 0; y < GameWorld.numRows; y++) {
                    for (let x = 0; x < GameWorld.numColumns; x++) {
                        const cell = new Cell(this.context, x, y);
                        this.gameObjects.push(cell);
                    }
                }
            }

            addMouseInput() {
                this.canvas.addEventListener('pointerdown', (event) => {
                    const cell = this.getCellAt(event);

                    // Flip the cell you click, and draw with that state
                    this.drawAlive = !cell.isAlive;
                    cell.isAlive = this.drawAlive;
                });

                this.canvas.addEventListener('pointermove', (event) => {
                    // Only draw while the mouse button is down
                    if (event.buttons == 1) {
                        this.getCellAt(event).isAlive = this.drawAlive;
                    }
                });
            }

            getCellAt(event) {
                // The mouse position on the canvas, in screen pixels
                const rect = this.canvas.getBoundingClientRect();
                const mouseX = event.clientX - rect.left;
                const mouseY = event.clientY - rect.top;

                // Divide by the size of a cell on the screen
                const cellWidth = rect.width / GameWorld.numColumns;
                const cellHeight = rect.height / GameWorld.numRows;
                const x = Math.floor(mouseX / cellWidth);
                const y = Math.floor(mouseY / cellHeight);

                return this.getCell(x, y);
            }

            loadPattern(pattern) {
                // Put the pattern in the middle of the grid
                const left = Math.floor(
                    (GameWorld.numColumns - pattern[0].length) / 2
                );
                const top = Math.floor(
                    (GameWorld.numRows - pattern.length) / 2
                );

                this.gameObjects.forEach((cell) => {
                    // An O is a living cell, anything else is dead
                    const row = pattern[cell.gridY - top] || '';
                    cell.isAlive = row[cell.gridX - left] == 'O';
                });
            }

            gameLoop() {
                // Check the neighbors of each cell and update the state
                this.updateCells();

                // Clear the screen
                this.context.clearRect(
                    0, 0, this.canvas.width, this.canvas.height
                );

                // Draw all the game objects
                this.gameObjects.forEach((gameObject) => {
                    gameObject.draw();
                });

                // The loop function has reached its end,
                // keep requesting new frames
                setTimeout(() => {
                    window.requestAnimationFrame(() => this.gameLoop());
                }, 100); // The delay will make the game easier to follow
            }

            updateCells() {
                // Count the living neighbors of every cell
                for (let y = 0; y < GameWorld.numRows; y++) {
                    for (let x = 0; x < GameWorld.numColumns; x++) {
                        let numAlive = this.getNumAliveNeighbors(x, y);
                        let cell = this.getCell(x, y);

                        if (numAlive == 2) {
                            // Keep the current state
                            cell.isAliveNextFrame = cell.isAlive;
                        } else if (numAlive == 3) {
                            // Comes alive
                            cell.isAliveNextFrame = true;
                        } else {
                            // Dies
                            cell.isAliveNextFrame = false;
                        }
                    }
                }

                // Apply the new state to all the cells at once
                this.gameObjects.forEach((gameObject) => {
                    gameObject.isAlive = gameObject.isAliveNextFrame;
                });
            }

            getNumAliveNeighbors(x, y) {
                // Check every surrounding cell in the neighborCellsMap
                return GameWorld.neighborCellsMap.reduce(
                    (numNeighbors, [dx, dy]) => {
                        return (
                            numNeighbors +
                            (this.isCellAlive(x + dx, y + dy) ? 1 : 0)
                        );
                    },
                    0
                );
            }

            isCellAlive(x, y) {
                if (GameWorld.wrapEdges) {
                    // Wrap around: -1 becomes the last column or row
                    x = (x + GameWorld.numColumns) % GameWorld.numColumns;
                    y = (y + GameWorld.numRows) % GameWorld.numRows;
                } else if (
                    x < 0 || x >= GameWorld.numColumns ||
                    y < 0 || y >= GameWorld.numRows
                ) {
                    // Everything beyond the edges counts as dead
                    return false;
                }

                return this.getCell(x, y).isAlive;
            }

            getCell(x, y) {
                return this.gameObjects[this.gridToIndex(x, y)];
            }

            gridToIndex(x, y) {
                return x + (y * GameWorld.numColumns);
            }
        }

        window.onload = function () {
            // The page has loaded, start the game
            let gameWorld = new GameWorld('canvas');

            // To start with a glider instead of random cells
            // gameWorld.loadPattern(['.O.', '..O', 'OOO']);
        };
    </script>
</body>

</html>
Conclusion
The Game of Life is a cellular automaton that's easy to build in JavaScript. The game rules decide which cells live or die, and this results in interesting patterns. With a game loop and just a few conditional statements, you can make your HTML canvas come alive! You can now also draw your own cells, wrap the edges and load any pattern from LifeWiki.
When simple rules add up to something bigger like this, that's called emergent behavior. Want to see more of it? In the tutorial on flocking with boids, three rules turn a group of triangles into a flock of birds.
That's all for now. If you liked this tutorial or have any questions, let us know in the comment section. Found a pattern that does something cool? Paste it in the comments. We'd love to see it. You can download the example code here.
More Algorithm tutorials

Steering behaviors in JavaScript: seek, flee, arrive, wander and more
Learn to code steering behaviors in JavaScript, from seek and arrive to wander, pursue and path following. Every behavior is a short method you can copy, with a live demo on the HTML5 canvas to play with. Then combine them, and your game characters will find their own way around.
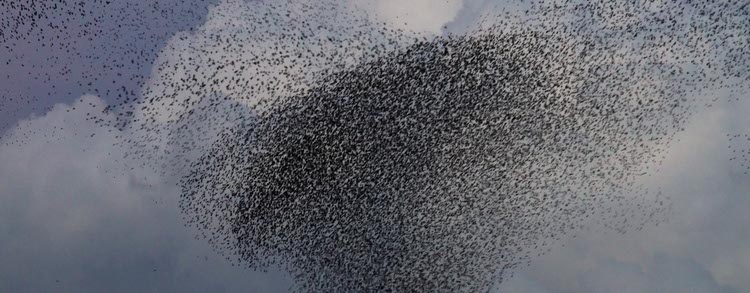
Simulate a flock of birds with boids in JavaScript
Simulate a flock of birds in JavaScript with the boids algorithm. Code the three rules of flocking one by one, with a live demo for each step. Then add obstacles and a predator, and give the boids a field of view. By the end of this tutorial, you'll have a flock of thousands of boids running smoothly in your browser.
Comments
Thanks! We've received your comment. We check every comment by hand before it appears, so this can take a few days.

No comments yet. Be the first to leave one!