
0 Spicy Yoghurt | Last updated: 20 October 2026 | HTML5 game tutorial
Create a proper JavaScript game loop
Build a smooth JavaScript game loop for the canvas with requestAnimationFrame. Learn about delta time and fixed timesteps, and measure fps with live demos. By the end of this tutorial, you'll have a complete game loop ready to use in your own game.
Why do you need a game loop?
In the previous tutorial, you created an application that draws a rectangle on an HTML5 canvas. That's super nice and all, but that drawing operation is only performed once. If you want to make it appear as if the rectangle is moving, and eventually create an actual game, you need to draw more. A lot more.
To achieve this, you'll need a loop to repeatedly execute your game logic. In the world of games, this loop is called a game loop. It'll be the core of your game and trigger the drawing operations. Instead of a single static image, you'll draw many images one after another, which creates motion.
Here's an example with a moving circle. Each frame shows the circle in a slightly different position, and every frame is one iteration of your game loop. At 2 fps you can still see the individual frames. Switch to 60 fps, and the small steps follow each other so quickly that they create the illusion of motion.
The benefits of a high frame rate
As you might know, when it comes to games, people talk about how many fps they can get out of their gaming rig. Fps stands for frames per second. Each time you draw your game objects on the screen counts as a frame.
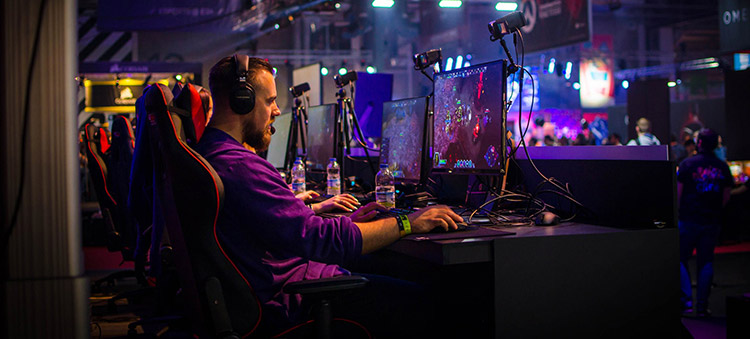
Fps is the number of times per second you can draw your game on the screen. In general, the better your hardware, the higher your fps will be. And the higher your fps, the smoother your game will play. Also, the delay between frames will get shorter, making the visible state of the game more up to date. This can give you an edge in the game. That's why professional gamers want to squeeze out every frame they can get and spend a lot on the best possible hardware.
The ideal frame rate for your game loop
Humans can see about 10 to 12 frames per second as separate images. Any more frames than that and you will perceive it as motion, and that is what you want for your game. Of course, a game running at 12 fps would be extremely choppy. You might see it as motion, but you need more frames if you want to make it look smooth. Movies generally use 24 fps, but most games run at a much higher frame rate than that. If more is better, why not just aim to run your game at 240 fps and make it ultra-smooth?
Well, there is also the refresh rate of your display to take into account. A display shows a new image a fixed number of times per second, measured in hertz (Hz). For years, 60 Hz was the standard. These days a lot of phones and laptops run at 90 or 120 Hz, and gaming monitors go up to 144 Hz, 240 Hz or even higher.
Running a game at 240 fps on a 60 Hz display won't do much good. You'll have more frames to draw than your display can show. The extra frames will never be displayed and only cost you system resources. And an HTML5 game isn't just for high-end desktop rigs with great displays. It probably has to run and perform well on mobile devices too.
A frame rate that's equal to the refresh rate of your display would be ideal. It offers the smoothest experience and keeps the game state as up to date as possible. But you also don't want your game to use more system resources than it needs or drain a phone's battery.
So, to sum it all up, this is what you'll be looking for in a game loop for an HTML5 game:
- A frame rate that is as high as possible for smoothness
- A frame rate that isn't higher than the screen refresh rate
- A frame rate that doesn't use too many system resources
Let's check out some options and see how well they fit these requirements. You are going to find the perfect loop for your game and learn about common mistakes.
Set up a game loop
OK, so you need a game loop? Why not just use this simple while loop in your JavaScript code?
// A bad game loop
while (running) {
    draw();
}
The loop just starts up and keeps on drawing, as fast as your hardware allows. So you'd get the highest fps possible, right?
But there is a small problem. JavaScript runs your code on a single thread, the main thread of the browser tab. With the while loop, all of that thread's time goes into the drawing operations, again and again. The browser only updates the screen when your code is done, and this loop is never done. So you never see a single frame of what you've drawn. The browser can't handle user input or other important events either, so not even a pause button can stop the loop. If you let it run for a while, it will hang your browser and eventually trigger the dreaded "this page is not responding" warning.
To fix this, you'll need to give the browser some breathing room while the game loop runs. You could use something like setInterval() to call the game loop at a fixed interval. This puts some time between drawing operations, giving the browser space to perform tasks other than drawing.
// Another bad game loop
setInterval(gameLoop, 16);

function gameLoop() {
    draw();
}
With an interval of 16 ms, this game loop will reach about 60 fps. This will perform better than the while loop, but there is no guarantee that the browser is ready to perform a repaint when the gameLoop() function is triggered. You might calculate frames that are never put on your display, or miss one now and then, which makes the motion stutter. And the interval knows nothing about your display. On a 120 Hz screen it still runs at 60 fps. A setTimeout() that keeps calling itself has the same problems. So how do you fix this?
The proper JavaScript game loop
You need a way to loop without blocking the browser and to keep your game loop in sync with the browser's repaints. Luckily, there's a solution. You can use window.requestAnimationFrame() to tell the browser you want to update an animation, or in this case a game, before the next repaint.
// The proper game loop
window.requestAnimationFrame(gameLoop);

function gameLoop() {
    draw();
    window.requestAnimationFrame(gameLoop);
}
The browser will call your callback function right before it draws the next frame on the screen. It does this when it's ready, so it won't hang the system. And when a browser tab is hidden, most browsers pause the callbacks completely. This saves system resources and battery life.
Do you remember the section about frame rates? Well, the browser picks a suitable frame rate for the device it's running on. The callbacks follow the refresh rate of the display: about 60 times per second on a 60 Hz screen, 120 times on a 120 Hz screen, and so on.
The method meets all the requirements for a proper game loop. The loop runs at a frame rate that makes the game look smooth, takes the refresh rate of the screen into account and reduces the use of system resources. Here's a quick overview of the options you've seen so far:
- while loop - Blocks the browser. Nothing is shown on the screen and the page stops responding.
- setInterval() or setTimeout() - Keeps the browser responsive, but runs on its own schedule. Frames get wasted or skipped and the refresh rate of the screen is ignored.
- requestAnimationFrame() - Runs right before each repaint, follows the refresh rate and pauses in a hidden tab. The perfect match for your own HTML5 game.
How to use requestAnimationFrame()
The function window.requestAnimationFrame() accepts a callback function as an argument. You can pass your gameLoop() function in there. When the browser is ready, it will execute that function.
You will have to start the game loop by calling window.requestAnimationFrame() once, and then keep on calling it inside the loop. It's easier to understand with an example:
<script>
    'use strict';
    let canvas;
    let context;

    window.onload = init;

    function init() {
        canvas = document.getElementById('canvas');
        context = canvas.getContext('2d');

        // Start the first frame request
        window.requestAnimationFrame(gameLoop);
    }

    function gameLoop(timeStamp) {
        draw();

        // Keep requesting new frames
        window.requestAnimationFrame(gameLoop);
    }

    function draw() {
        let randomColor = Math.random() > 0.5 ? '#ff8080' : '#0099b0';
        context.fillStyle = randomColor;
        context.fillRect(275, 112, 200, 175);
    }
</script>
The callback from requestAnimationFrame() is given one argument, a timestamp in milliseconds. It marks the moment the previous frame was done, measured on the same clock as performance.now(). It's close to what you would get from calling performance.now() yourself, but never exactly the same. Every callback in the same frame gets the same timestamp, so everything in your game is updated for the same moment in time.
You won't be doing anything with the timestamp right now. Further down this page you'll use it to measure the fps and to keep the speed of your game the same on every screen. In the next tutorial about canvas animations, you'll use it to move objects and add easing.
Check out the running game loop
Let's try out your new game loop. When you run this code, you'll see a big difference compared to the previous tutorial, which called draw() only once. The draw() function is now called many times in a row. The rectangle is redrawn roughly 60 times per second, or more on a screen with a higher refresh rate.
Here's a diagram of your game loop. For now, it's a pretty simple one:
Most game loops end up doing three things every frame, always in the same order. First they handle the player's input, then they update the game objects, and as a final step they draw everything to the screen. That way the screen always shows the latest state of your game. Right now your loop only draws, but the next tutorials in this series add the other tasks one by one.
The color of the rectangle is still random, and a new one is picked every frame. That's why you now see a flickering rectangle that switches rapidly between red and blue. This makes it easier to see that the game loop is actually working. The flickering isn't very pleasant to look at, though.
Measure and display fps
Well done, you've made a game loop and it's working. But wouldn't it be nice if you could measure its performance and check out how many frames per second it produces? Let's try to calculate the current fps by using the timeStamp parameter provided in the game loop.
First, calculate the time that has passed since the previous frame. You can do that by subtracting the timestamp of the previous frame from the current timestamp. The result is the number of milliseconds since the last frame.
Divide this number by 1000 to go from milliseconds to seconds. This is the number of seconds it takes to produce one frame. Divide 1 by this number to get the number of frames per second.
Here is an example of a very simple implementation that uses a fillText() drawing operation, as explained in the canvas drawing tutorial, to draw the fps as text to the screen:
let oldTimeStamp = 0;
let fps = 0;

function gameLoop(timeStamp) {
    // Calculate the number of seconds passed since the last frame
    let secondsPassed = (timeStamp - oldTimeStamp) / 1000;
    oldTimeStamp = timeStamp;

    // Calculate fps
    fps = Math.round(1 / secondsPassed);

    // Draw the number on the screen
    context.fillStyle = 'white';
    context.fillRect(0, 0, 200, 100);
    context.font = '25px Arial';
    context.fillStyle = 'black';
    context.fillText('FPS: ' + fps, 10, 30);

    // Perform the drawing operation
    draw();

    // The loop function has reached its end. Keep requesting new frames
    window.requestAnimationFrame(gameLoop);
}
The fps is updated every frame, so the number keeps jumping around and is hard to read. A better way is to count the frames and update the number once every second:
let frameCount = 0;
let fpsTimer = 0;

function gameLoop(timeStamp) {
    let secondsPassed = (timeStamp - oldTimeStamp) / 1000;
    oldTimeStamp = timeStamp;

    // Count the frames and update the fps once per second
    frameCount++;
    fpsTimer += secondsPassed;
    if (fpsTimer >= 1) {
        fps = Math.round(frameCount / fpsTimer);
        frameCount = 0;
        fpsTimer = 0;
    }

    // Draw the fps and the rectangle, like before
    // ...

    window.requestAnimationFrame(gameLoop);
}
Here is the result. If you view this page on a desktop device with a regular screen, it should hit a nice 60 frames per second. On a phone or a gaming monitor you might see 90, 120 or even more.
Start, pause and stop the game loop
Right now, your game loop runs forever. In a real game you'll want to pause it, for example when the player opens a menu, and stop it when the game is over.
Each call to requestAnimationFrame() returns an ID for the frame you've requested. Pass that ID to cancelAnimationFrame() and the request is canceled. The callback never runs, so the loop stops. Here's an example:
let frameId;

function startLoop() {
    frameId = window.requestAnimationFrame(gameLoop);
}

function stopLoop() {
    window.cancelAnimationFrame(frameId);
}

function gameLoop(timeStamp) {
    draw();

    // Keep requesting new frames and remember the ID
    frameId = window.requestAnimationFrame(gameLoop);
}
Make sure you store the ID every time you request a new frame. If you don't, you'll be canceling an old request and the loop just keeps on running.
There's one thing to watch out for when you start the loop again after a pause. The first frame sees a big gap in time since the previous one, so your game jumps ahead. And there's a similar problem with the very first frame you draw on your canvas. The oldTimeStamp is still 0, so it counts all the time since the page started loading. You can fix both by having the first frame only remember its timestamp:
function startLoop() {
    // The first frame only sets the clock
    frameId = window.requestAnimationFrame(firstFrame);
}

function firstFrame(timeStamp) {
    oldTimeStamp = timeStamp;
    frameId = window.requestAnimationFrame(gameLoop);
}
From the second frame on, the loop measures the time like before.
Same speed at 60 Hz and 144 Hz
Remember that requestAnimationFrame() follows the refresh rate of the display? That's great for smoothness, but it has a side effect. If you move a game object a fixed number of pixels each frame, it moves twice as fast on a 120 Hz screen as on a 60 Hz screen. On a 144 Hz gaming monitor it's even faster.
Imagine a racing game where the cars move 2 pixels per frame. A player with a fancy new laptop would suddenly have the fastest car in the race. Not very fair.
The fix is to use time instead of frames. You already know how much time has passed since the last frame: the secondsPassed from the fps meter. This is often called delta time. Multiply the speed of your objects by it and they move the same distance per second, no matter how many frames you get:
let rectX = 0;
let movingSpeed = 120;

function update(secondsPassed) {
    // Move 120 pixels per second, no matter the frame rate
    rectX += movingSpeed * secondsPassed;
}
At 60 fps, secondsPassed is about 0.0167, so the rectangle moves 2 pixels per frame. At 120 fps it's half of that, 1 pixel per frame, but twice as often. After one second, both have moved 120 pixels.
Try it out in the demo below. The top block moves a fixed distance each frame, while the bottom block moves based on time. Switch between the frame rates and see what happens:
There's one catch. When a player switches to another tab, the loop is paused. When they come back, secondsPassed can be several seconds and all your game objects make a giant leap. To prevent this, limit the delta time to a maximum, for example 0.1 seconds:
// Cap the delta time at 0.1 seconds
secondsPassed = Math.min(secondsPassed, 0.1);
Use a fixed timestep for physics
Delta time works fine for most animations. But once you add physics and collision detection, a timestep that changes every frame can cause trouble. With a big step, a fast ball can move straight through a wall without ever touching it. And a jump can end up a little higher on one computer than on another, because the math gives slightly different results for different step sizes.
Physics engines solve this with a fixed timestep. The game logic always moves forward in the same small steps, for example 1/60 of a second, no matter the frame rate. The loop uses an accumulator to keep track of the time that still needs to be simulated:
const fixedStep = 1 / 60;
let accumulator = 0;
let oldTimeStamp = 0;

function gameLoop(timeStamp) {
    let secondsPassed = (timeStamp - oldTimeStamp) / 1000;
    oldTimeStamp = timeStamp;

    // Catch up by at most 0.1 seconds per frame
    secondsPassed = Math.min(secondsPassed, 0.1);

    // Add the time that has passed to the accumulator
    accumulator += secondsPassed;

    // Update in fixed steps, as many as fit in the accumulated time
    while (accumulator >= fixedStep) {
        update(fixedStep);
        accumulator -= fixedStep;
    }

    draw();
    window.requestAnimationFrame(gameLoop);
}
Each frame, the time that has passed is added to the accumulator. Then update() runs once for every whole step that fits in it. On a 60 Hz screen that's usually once per frame. On a 120 Hz screen it's about every other frame, and on a slow device it can be two or three times in a single frame.
The Math.min() line protects you from the spiral of death. If the device can't keep up, every frame has more updates to do, which makes the next frame even slower, and so on, until the game freezes. With a cap in place, the game just slows down a bit instead. A limit of 0.1 seconds is a sensible choice, but the best value depends on your game. With a higher limit, the game catches up more after a hiccup, but your objects also make a bigger jump.
Here's what that looks like in slow motion. Change the refresh rate to see how many updates run in each frame:
What's left in the accumulator is part of a step that hasn't been simulated yet. On a screen with a high refresh rate, this can make the motion look a bit jerky, because the objects only move 60 times per second while the screen shows more frames. You can smooth this out with interpolation. Draw every object between its previous and its current position, using the leftover time:
// How far we are between the last update and the next one (0 to 1)
let stepProgress = accumulator / fixedStep;
draw(stepProgress);
In draw() you then use previousX + (x - previousX) * stepProgress as the position, instead of x. At the start of every update(), save x in previousX. This only changes where the object is drawn. The game itself still moves in fixed steps in update(), so collisions and physics work the same on every screen. The demo below updates a bouncing ball only 10 times per second, so you can clearly see the difference. Turn interpolation on and off:
The idea comes from the article Fix Your Timestep! by Glenn Fiedler, a classic among game developers. Do you need it for every game? Not really. If your game doesn't rely on precise physics, delta time is fine. For collisions and physics, a fixed timestep makes life a lot easier.
Pause the game when the tab is hidden
Browsers pause requestAnimationFrame() in a hidden tab, but the rest of your game doesn't know that. Music keeps playing, a countdown that uses the clock keeps running, and when the player returns, the delta time is huge. With the Page Visibility API you can find out when the page is hidden and pause the game yourself:
document.addEventListener('visibilitychange', function () {
    if (document.hidden) {
        pauseGame();
    } else {
        resumeGame();
    }
});
In pauseGame() you can stop the loop with cancelAnimationFrame(), mute the sound and show a pause menu, so the player can continue when they're ready. In resumeGame() you start it again. Want a pause menu with buttons and a game that keeps drawing while it's paused? See the JavaScript game states tutorial.
Should you limit the frame rate?
Most of the time, you don't have to limit the frame rate. Let requestAnimationFrame() follow the screen and use delta time or a fixed timestep for the speed of your game. But sometimes there's a good reason, for example to save battery in a simple puzzle game that doesn't need 120 fps.
You can skip frames until enough time has passed:
const fpsLimit = 30;
const frameInterval = 1000 / fpsLimit;
let lastDrawTime = 0;

function gameLoop(timeStamp) {
    window.requestAnimationFrame(gameLoop);

    // Skip this frame if it's too soon
    let elapsed = timeStamp - lastDrawTime;
    if (elapsed < frameInterval) {
        return;
    }

    // Keep the leftover time, so the rhythm stays even
    lastDrawTime = timeStamp - (elapsed % frameInterval);

    update();
    draw();
}
The line with the leftover time matters. Frames never arrive at exactly the same interval, so without it, a frame that's a tiny bit early gets skipped. A 30 fps limit on a 60 Hz screen would then end up at about 24 fps. Also pick a limit that fits the refresh rate of the screen. 30 fps works well on 60, 90, 120 and 240 Hz screens, because those are all multiples of 30. 144 isn't, so the loop switches between every fourth and fifth refresh, and the motion gets a little uneven.
The Conway's Game of Life tutorial slows down its loop in a different way. It uses a setTimeout() to wait before requesting the next frame, so you can follow each generation. That works fine there. Nothing in the Game of Life moves smoothly: every generation is a new picture. The point being, there's no single right way to slow down your loop. Pick the solution that fits your project.
Common questions about game loops
Should I use setInterval() or requestAnimationFrame() for a game loop?
Use requestAnimationFrame(). It runs in sync with the screen, follows its refresh rate and pauses in a hidden tab. setInterval() and setTimeout() run on their own schedule, which wastes frames and can make the motion stutter.
Why does my game run faster on a 120 Hz or 144 Hz screen?
Because requestAnimationFrame() calls your game loop once for every screen refresh. If you move your objects a fixed amount per frame, they move faster when there are more frames. Use the delta time instead, as explained above.
Does requestAnimationFrame() run in a background tab?
No, browsers pause it when the tab is hidden. In an iframe that's out of view it can be slowed down as well. When the player comes back, limit the delta time, so your game doesn't jump ahead.
How many fps does a game need?
There's no fixed number. 30 fps is playable, 60 fps feels smooth for most games, and fast action games benefit from more. With requestAnimationFrame() you get what the screen supports, so make sure your game also plays well at 60 fps.
How does this work in PixiJS or three.js?
Libraries like these run the game loop for you, on top of requestAnimationFrame(). PixiJS has a ticker that calls your function every frame and tells you how much time has passed. In three.js you pass your function to renderer.setAnimationLoop(). The ideas on this page, like delta time and a fixed timestep, still apply.
The complete game loop
Here's everything put together: a game loop with a fixed timestep for the game logic, interpolation for smooth motion, a cap on the delta time and an fps meter. You can start, pause and stop it with the buttons, and it pauses by itself when the tab is hidden. Use it as a starting point for your own game:
<!DOCTYPE html>
<html lang="en">

<head>
    <meta charset="UTF-8">

    <title>JavaScript Game Loop Tutorial | Spicy Yoghurt</title>
</head>

<body>
    <canvas
        id="canvas"
        width="750"
        height="400"
        style="border:1px solid lightgray;"
    >
        Your browser does not support the HTML5 canvas tag.
    </canvas>
    <div>
        <button onclick="startLoop()">Start</button>
        <button onclick="pauseLoop()">Pause</button>
        <button onclick="stopLoop()">Stop</button>
    </div>
    <script>
        'use strict';
        let canvas;
        let context;
        let frameId = null;

        // Game logic runs 60 times per second
        const fixedStep = 1 / 60;
        let accumulator = 0;
        let oldTimeStamp = 0;

        // Fps meter
        let frameCount = 0;
        let fpsTimer = 0;
        let fps = 0;

        // A moving rectangle
        let rectX = 0;
        let previousX = 0;
        let movingSpeed = 200;

        window.onload = init;

        function init() {
            canvas = document.getElementById('canvas');
            context = canvas.getContext('2d');

            // Pause the game when the tab is hidden.
            // The player can resume with the start button
            document.addEventListener('visibilitychange', function () {
                if (document.hidden) {
                    pauseLoop();
                }
            });

            startLoop();
        }

        function startLoop() {
            // Don't start a second loop if one is already running
            if (frameId !== null) {
                return;
            }

            // The first frame only sets the clock
            frameId = window.requestAnimationFrame(firstFrame);
        }

        function firstFrame(timeStamp) {
            oldTimeStamp = timeStamp;
            frameId = window.requestAnimationFrame(gameLoop);
        }

        function pauseLoop() {
            window.cancelAnimationFrame(frameId);
            frameId = null;
        }

        function stopLoop() {
            pauseLoop();

            // Put the rectangle back at the start
            rectX = 0;
            previousX = 0;
            accumulator = 0;
            draw(0);
        }

        function gameLoop(timeStamp) {
            // Calculate the number of seconds passed since the last frame
            let secondsPassed = (timeStamp - oldTimeStamp) / 1000;
            oldTimeStamp = timeStamp;

            // Catch up by at most 0.1 seconds per frame
            secondsPassed = Math.min(secondsPassed, 0.1);

            // Update the game logic in fixed steps
            accumulator += secondsPassed;
            while (accumulator >= fixedStep) {
                update(fixedStep);
                accumulator -= fixedStep;
            }

            // Count the frames and update the fps once per second
            frameCount++;
            fpsTimer += secondsPassed;
            if (fpsTimer >= 1) {
                fps = Math.round(frameCount / fpsTimer);
                frameCount = 0;
                fpsTimer = 0;
            }

            // Draw between the last update and the next one
            draw(accumulator / fixedStep);

            // Keep requesting new frames
            frameId = window.requestAnimationFrame(gameLoop);
        }

        function update(step) {
            // Remember the old position for the interpolation
            previousX = rectX;
            rectX += movingSpeed * step;

            // Start again on the left
            // when the rectangle leaves the canvas
            if (rectX > canvas.width) {
                rectX = -150;
                previousX = rectX;
            }
        }

        function draw(stepProgress) {
            // Clear the canvas
            context.clearRect(0, 0, canvas.width, canvas.height);

            // Draw the rectangle
            // between its previous and current position
            let x = previousX + (rectX - previousX) * stepProgress;
            context.fillStyle = '#ff8080';
            context.fillRect(x, 150, 150, 100);

            // Draw the fps
            context.fillStyle = 'black';
            context.font = '25px Arial';
            context.fillText('fps: ' + fps, 10, 30);
        }
    </script>
</body>

</html>
What's next?
That's it for game loops for now. Your JavaScript game loop is in place and the rectangle gets redrawn many times per second. You understand the relationship between fps and a game loop, you can measure the fps of your own game and you know how to keep the speed the same on every screen. If you have any questions, feel free to ask them in the comment section. You can download the example code here.
In the next tutorial, the rectangle will come to life. You'll learn how to add motion and create animations on the HTML5 canvas, with motion trails, easing and a lot more.
Comments
Thanks! We've received your comment. We check every comment by hand before it appears, so this can take a few days.

No comments yet. Be the first to leave one!