Spicy Yoghurt | Last updated: 24 September 2018 | Inkscape tutorial
Draw vector potion bottles
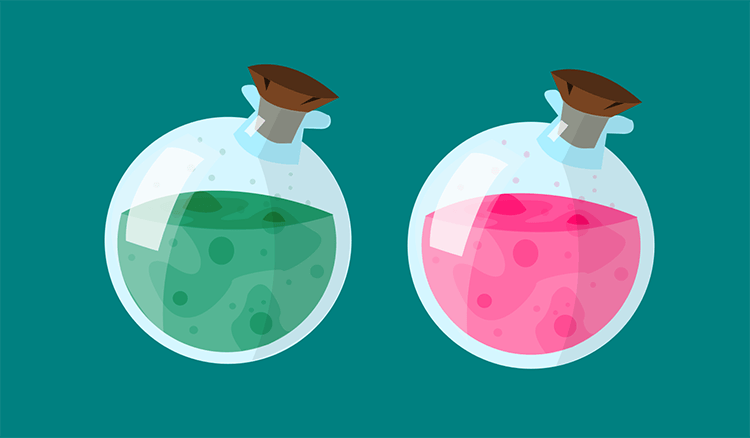
Learn how to draw vector potion bottles with this Inkscape vector drawing tutorial. You will make a potion bottle with a cork and special content. On the way, this tutorial will teach you how to use Inkscape as a vector graphics editor.
Set-up Inkscape
In this tutorial you will learn how to make vector potion bottles in Inkscape. Inkscape is an open source vector graphics editor. It might look a little bit less fancy than, let say, Adobe Illustrator, but it has all the same features and it's totally free. Plus it works on Windows and MacOS. That makes it ideal for people who are just starting to learn how to make vector graphics. You can download Inkscape here.
When you're all set-up, launch Inkscape and start the tutorial!
Draw a basic bottle shape
We are going to start with the basic shape of the potion bottle. Draw an eclipse using the Ellipse Tool (F5). Hold Ctrl while dragging to create a perfectly round circle shape. Once the base is ready, grab the Bezier Tool (Shift+F6). Use this tool to draw the neck of the bottle. Start by clicking on the canvas to place a node. Click again to place the next one. You can hold down the right mouse button and drag to adjust the angle of the line between the nodes. If you want to draw a straight line use the shortcut Shift+L. This will remove any curves. Connect the starting node with the ending node to finish your shape.

The top doesn't have to be perfect. There is a cork going to fall over this part. Even in the example image you can see it's all wobbly, but that's not going to be visible in the end result. You can set up a basic shape and adjust it later by double clicking the shape or selecting the Node Tool (F2). Adjust the nodes until the shape is as desired.
Place the neck on top of the bottle. You can rearrange the order of the shapes by going to the Object menu and selecting Raise or Lower.
Add color to the glass
Select the circle shape you've drawn in the previous step. Go to Object > Fill and Stroke in the menu to open up the color selector. You see multiple tabs here for fill and stroke. The fill defines the base paint for the object. The stroke can be seen as a line around the edges of the shape. Both are optional. This isn't just an Inkscape thing, it's how all vector images are build.
Pick a nice light blue color to use as the fill color. Now do the same for the neck of the bottle, only pick a slightly darker color blue. The glass is thicker here. You don't have to select a stroke paint, so leave it empty. Adding strokes to shapes can quickly make things look cartoonish, and that's not what we're aiming for right now.
Draw a cork

The cork is supposed to fit in the glass neck. Grab the Bezier Tool (Shift+F6) again and draw the base of the cork. Give this part a light brown color. Now draw the top of the cork, and give this part a darker color brown. The top is supposed to fit exactly in the bottom. You could subtract the two shapes to create a perfect fit (see Path-options in the menu), but I prefer to draw two separate shapes by hand and use the Node Tool (F2) to adjust them if necessary.
I personally never use the path tool to merge or subtract paths. It can become a total mess. You can work faster by just drawing a second path over the first. Zoom in deep enough to correct the tiny mistakes you make. It doesn't have to be perfect, you will zoom out again later. That's the advantage of drawing vector graphics.
You can add some cracks to the cork by drawing triangle shapes from the top. Use a slightly darker fill color than the top to make the cracks look deep.
Add a light blue transparent shape over the base of the cork. It will appear as if the cork is fitted into the glass. Position this newly draw cork on top of the bottle neck.
Draw shadows and highlights

Now it's time for the part that will make this bottle come to life. It looks totally flat now, but you are going to fix that with shadows and highlights that emulate a light source. But first make sure you create a new layer. Place it on top of you previous work. You can view Layers from the menu or press Shift+Ctrl+L to open up the layer view. In there you can create layers and rearrange them.
With your new layer selected, draw a shadow shape over the bottle. Use a transparent black to overlay about one third of the bottle on the right. Curve the shadow to make it appear as if the glass is round. The shape doesn't have to be perfect. You can rearrange it again by double clicking or opening up the Node Tool (F2).
Use a transparent white to create the highlights. Create a small rounded square to the left and a smaller one on the neck of the bottle. This is where the light is coming from. Your bottle is now starting to look less flat and more like an actual bottle.
Create the potion bottle contents

And now the fun stuff: the content of your potion bottle. Create a third layer using the layer view and place it in the middle, between your base layer and shadow layer. Draw up the content of your bottle. It can be anything. In this example it's some colored fluid, but you could also make it more transparent, or maybe thicker.
To make it look realistic make sure the content exactly follows the curves of the bottle. And leave some space for the thickness of the glass. You can add blobs and different shades of color to make it more dynamic. Try out different colors for different types of potions.
Your own vector potion bottles!

You're done! You've drawn your own vector potion bottles with Inkscape. From here you can try to experiment with differently shaped bottles and other types of mixtures as content.


Leave a comment